Understanding the Timeline and Costs of a Full Kitchen Remodel: What to Expect

Understanding the Timeline and Costs of a Full Kitchen Remodel: What to Expect

Embarking on a full kitchen remodel is an exciting yet daunting endeavor for many homeowners. It is a significant investment that requires careful planning, budgeting, and coordination of various tasks. In this article, we will explore what to expect during a full kitchen remodel in terms of timeline and costs, helping you navigate the process with confidence and clarity.

1. Planning and Design Phase

Before any physical work begins, the planning and design phase sets the foundation for the entire kitchen remodel project. This stage involves consultations with designers and contractors, creating a layout, selecting materials, appliances, and fixtures, obtaining permits, and finalizing a budget. The planning and design phase typically takes 1-3 months, depending on the complexity of the project and decision-making processes.

2. Demolition and Preparation

Once the design phase is complete, the demolition and preparation stage begins. This involves removing existing fixtures, cabinets, appliances, flooring, and walls as needed to prepare the space for the new kitchen layout. Demolition and preparation can take 1-2 weeks, depending on the size of the kitchen and the extent of the work required.

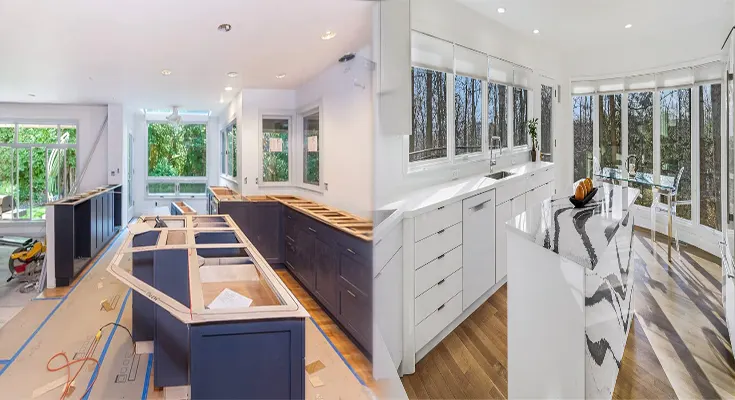
3. Structural Changes and Plumbing/Electrical Work

If structural changes, plumbing, or electrical work are necessary for the new kitchen layout, this phase will follow the demolition stage. This may involve moving walls, relocating plumbing fixtures, rewiring electrical circuits, or installing new lighting. Structural changes and plumbing/electrical work can take 2-4 weeks, depending on the scope of the project and the complexity of the tasks.

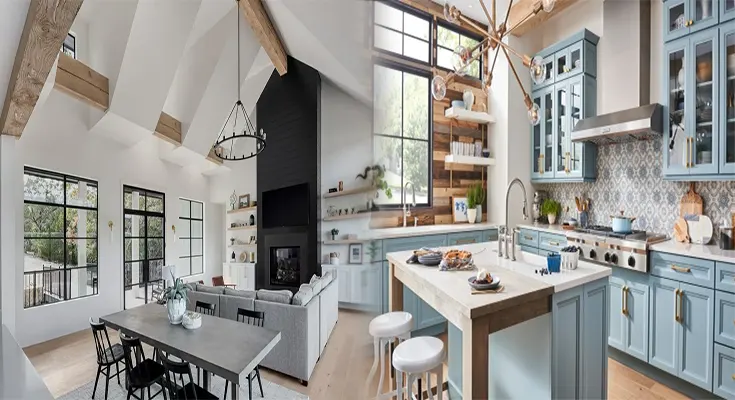
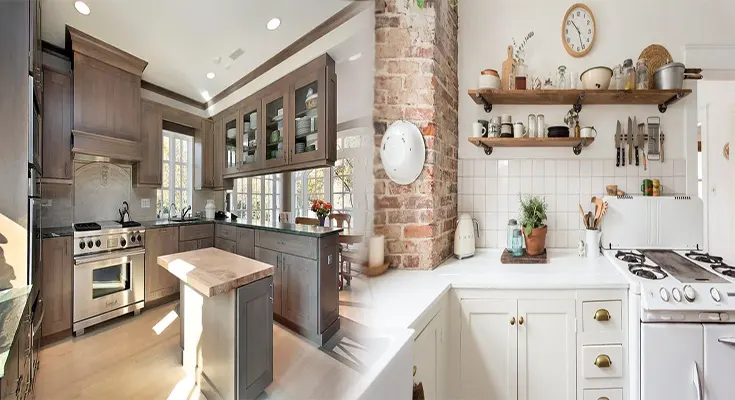
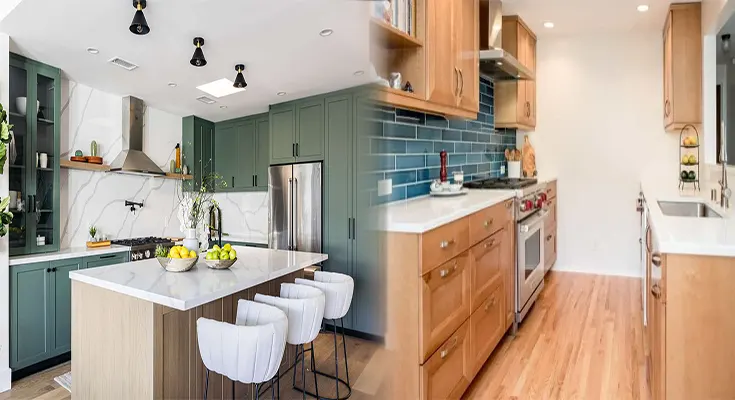
4. Installation of Cabinets, Countertops, and Appliances

Once the structural and utility work is complete, the installation of cabinets, countertops, and appliances can begin. This phase includes fitting and installing new cabinetry, countertops, backsplashes, and appliances to bring the kitchen design to life. The installation of cabinets, countertops, and appliances typically takes 2-4 weeks, …

Understanding the Timeline and Costs of a Full Kitchen Remodel: What to Expect Read More
Modern Farmhouse Kitchen Renovation: Before and After Examples

Modern Farmhouse Kitchen Renovation: Before and After Examples

The modern farmhouse aesthetic has gained popularity in recent years, especially in kitchen renovations. This design style combines the warmth and charm of a traditional farmhouse with the clean lines and contemporary elements of modern design. If you’re considering a kitchen renovation and are drawn to the modern farmhouse look, take inspiration from these before and after examples that showcase the stunning transformation of outdated kitchens into modern farmhouse masterpieces.

Before: Outdated and Closed-off Kitchen Space

Many outdated kitchens suffer from a lack of natural light, closed-off layouts, and an overall sense of cramped space. Dark and worn cabinets, outdated fixtures, and limited storage contribute to a dated and uninviting atmosphere. These kitchens often lack the character and functionality that homeowners desire, making them prime candidates for a modern farmhouse renovation.

After: Open and Airy Modern Farmhouse Excellence

In a modern farmhouse kitchen renovation, the transformation is truly breathtaking. A once dark and enclosed space is opened up to create an airy and inviting environment. Light colors, natural materials, and strategic use of space reinvent the kitchen into a stylish and functional hub of the home. Utilizing elements such as shiplap walls, exposed beams, farmhouse sinks, and reclaimed wood accents, the updated kitchen exudes a modern farmhouse charm that is both timeless and on-trend.

Here are some specific before and after examples showcasing the impact of modern farmhouse kitchen renovations:

Example 1: The Power of White

Before: An outdated kitchen with dark wood cabinets, limited natural light, and a closed-off feel.

After: All-white cabinetry, a farmhouse sink, and open shelving create a bright and welcoming space. A mix of textures, such as white subway tile backsplash and reclaimed wood floating shelves, add depth and character.

Example 2: Reclaimed Charm

Before: A cramped and dated kitchen with limited counter space and …

Modern Farmhouse Kitchen Renovation: Before and After Examples Read More
Step-by-Step Guide to a DIY Kitchen Backsplash Installation

Step-by-Step Guide to a DIY Kitchen Backsplash Installation

A kitchen backsplash not only adds visual appeal to your kitchen but also serves a practical purpose by protecting the wall from spills and splatters. Installing a backsplash can be a rewarding and cost-effective home improvement project that you can tackle yourself with the right tools and materials. Here’s a step-by-step guide to help you navigate through a DIY kitchen backsplash installation.

Step 1: Planning and Preparation

Before starting the installation, carefully assess the area where you plan to install the backsplash. Measure the space to determine the amount of materials needed. Additionally, ensure that the wall surface is clean, dry, and free of any debris or grease. If necessary, sand the wall to create a smooth and even surface for the backsplash to adhere to.

Step 2: Choose the Right Material

Select a backsplash material that suits your style and budget. Common options include ceramic or porcelain tiles, glass tiles, subway tiles, or peel-and-stick backsplash sheets. Consider the design and color scheme of your kitchen to choose a material that complements the overall look.

Step 3: Gather the Necessary Tools and Materials

Ensure you have all the essential tools and materials for the installation, including tiles or backsplash sheets, adhesive or mortar, tile spacers, trowel, tile cutter, level, grout, grout float, and a sponge for cleanup.

Step 4: Prepare the Adhesive or Mortar

If you are using individual tiles, mix the adhesive or mortar according to the manufacturer’s instructions. Consistency is key, so ensure the mixture is not too thin or too thick.

Step 5: Apply the Adhesive or Mortar

Using a trowel, apply the adhesive or mortar to the wall in a small section where you will begin the installation. Work in manageable areas to prevent the adhesive from drying out before you can install the tiles.

Step

Step-by-Step Guide to a DIY Kitchen Backsplash Installation Read More
Eco-Friendly Kitchen Renovation Ideas with Sustainable Materials

Eco-Friendly Kitchen Renovation Ideas with Sustainable Materials

As environmental consciousness continues to grow, many homeowners are seeking ways to make their homes more eco-friendly, and the kitchen is no exception. Renovating your kitchen with the environment in mind can not only reduce your carbon footprint but also create a healthier and more sustainable living space. By incorporating eco-friendly practices and utilizing sustainable materials, you can achieve a kitchen renovation that is both stylish and environmentally responsible. Here are some ideas to consider for an eco-friendly kitchen renovation focused on sustainable materials:

1. Reclaimed Wood Cabinetry

Opting for reclaimed wood for your kitchen cabinetry is an excellent way to reduce the demand for new timber while adding a rustic and unique charm to your kitchen. Reclaimed wood not only minimizes environmental impact but also eliminates the need for additional resources typically required in traditional cabinet manufacturing.

2. Recycled Glass Countertops

Consider installing countertops made from recycled glass to add a touch of elegance to your kitchen while reducing the amount of glass waste destined for landfills. Recycled glass countertops offer durability, resistance to heat and scratches, and a stunning visual appeal, making them a sustainable and stylish choice.

3. Energy-Efficient Appliances

When renovating your kitchen, investing in energy-efficient appliances can significantly reduce energy consumption. Look for appliances with high Energy Star ratings, which not only decrease your household’s energy usage but also lower utility bills over time.

4. Bamboo Flooring

Bamboo is a rapidly renewable resource that makes an excellent eco-friendly alternative to traditional hardwood flooring. Its quick growth cycle and minimal environmental impact during harvesting make bamboo a sustainable material choice for your kitchen flooring.

5. Low VOC Paints

Choose low volatile organic compound (VOC) paints for your kitchen walls and cabinets. Low VOC paints minimize the release of harmful chemicals into the air, contributing to better …

Eco-Friendly Kitchen Renovation Ideas with Sustainable Materials Read More
Maximizing Small Spaces: The Best Kitchen Layout Designs with an Island

Maximizing Small Spaces: The Best Kitchen Layout Designs with an Island

Designing a functional and aesthetically pleasing kitchen in a small space can be a challenging task. However, with the right layout and a well-thought-out design, it’s possible to create a stylish and efficient kitchen even in limited square footage. One way to achieve this is by incorporating an island into the kitchen layout. Here, we explore some of the best kitchen layout designs for small spaces with an island to help you make the most of your compact kitchen.

1. L-Shaped Layout with a Small Island

The L-shaped layout is a popular choice for small kitchens as it maximizes corner space and provides ample storage. By adding a small, slimline island to the open end of the “L,” you can create additional workspace and storage without overcrowding the room. This design allows for easy movement and promotes a smooth workflow for cooking and meal preparation.

2. Galley Kitchen with a Narrow Island

A galley kitchen, with its two parallel walls of cabinets and countertops, can benefit greatly from the addition of a narrow island down the center. This provides extra counter space and storage while keeping the walkway clear. By choosing a slim island design, you can avoid encroaching on the limited floor space typically found in galley kitchens.

3. U-Shaped Layout with a Multi-Functional Island

In a small kitchen with a U-shaped layout, an island can serve multiple purposes to make the most of the space. Consider installing a compact island with a built-in sink or cooktop, creating a centralized work area that maximizes efficiency. Additionally, using the underside of the island for extra storage or seating can further enhance the functionality of the space.

4. Open Plan Kitchen with a Movable Island

For small apartments or open-plan living spaces, a movable kitchen island offers flexibility and versatility. Opt …

Maximizing Small Spaces: The Best Kitchen Layout Designs with an Island Read More