Unlocking Inner Peace: How to Use Aromatic Incense Cones for Meditation and Focus

Unlocking Inner Peace: How to Use Aromatic Incense Cones for Meditation and Focus

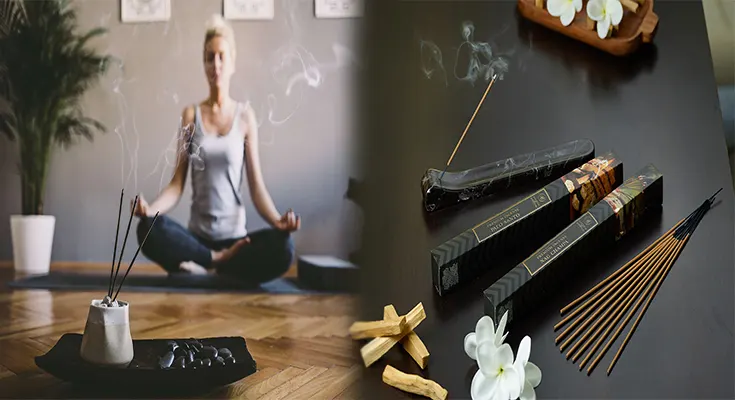
In today’s fast-paced world, finding moments of tranquility and focus is essential for maintaining a balanced and centered mindset. Meditation, a practice that has been revered for centuries, offers a pathway to inner peace and mental clarity. Incorporating aromatic incense cones into your meditation routine can elevate the experience, helping you achieve a deeper state of relaxation and concentration. In this article, we will explore the art of using aromatic incense cones for meditation and focus, offering insightful guidance to enhance your mindfulness journey.

Selecting the Right Aromatic Incense Cones

The journey of meditation and focus begins with choosing the appropriate aromatic incense cones. Opt for scents that evoke a sense of calm and serenity, such as lavender, sandalwood, or frankincense. These fragrances have been valued for their soothing properties and their ability to create an ambiance conducive to meditation and introspection. As you explore different scents, pay attention to how each one resonates with your senses and emotions, allowing yourself to be drawn towards scents that harmonize with your state of mind.

Creating a Sacred Space for Meditation

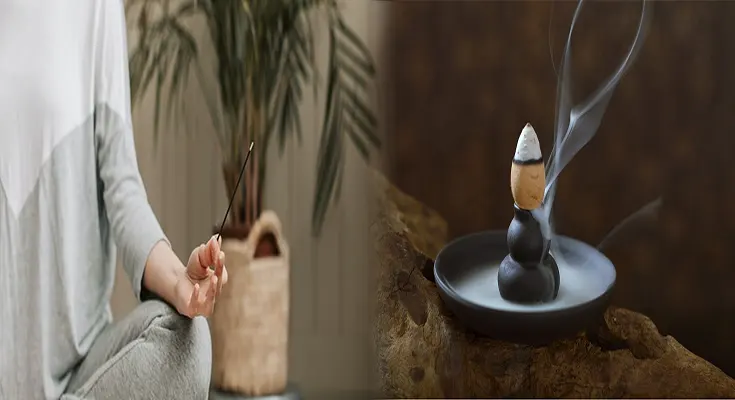
Before beginning your meditation session, take the time to prepare a sacred space that is conducive to relaxation and focus. Choose a quiet and comfortable area where you can sit or lay down without distractions. Light a candle and set the mood by burning the selected aromatic incense cone. As the fragrant plumes meander through the air, they will infuse the space with a calming aroma, preparing your mind for the practice of meditation.

Setting Intentions and Centering the Mind

As the aromatic incense cone releases its soothing fragrance, take a moment to set your intentions for the meditation session. Whether it is finding inner peace, gaining clarity, or simply finding a moment of respite, clarifying your purpose will guide your …

Unlocking Inner Peace: How to Use Aromatic Incense Cones for Meditation and Focus Read More
Upgrade Your Outdoor Space with the Cheapest Frost-Proof Outdoor Tiles for DIY Pathways

Upgrade Your Outdoor Space with the Cheapest Frost-Proof Outdoor Tiles for DIY Pathways

When it comes to enhancing the aesthetics and functionality of your outdoor living space, utilizing frost-proof outdoor tiles for DIY pathways can be a game-changer. These durable and low-maintenance tiles not only provide a visually appealing pathway but also offer longevity and weather resistance, making them a practical and cost-effective choice. In this article, we will explore the benefits of using the cheapest frost-proof outdoor tiles for DIY pathways and provide valuable insights to guide you in making the best decision for your outdoor upgrade project.

1. Durability and Frost-Proof Attributes

One of the key advantages of frost-proof outdoor tiles is their ability to withstand extreme weather conditions, particularly freezing temperatures. Unlike traditional tiles, frost-proof outdoor tiles are designed to resist cracking and damage caused by frost and ice, making them an ideal choice for outdoor pathways in regions prone to severe winters. This durability ensures that your DIY pathways will maintain their structural integrity and visual appeal for years to come, despite fluctuating weather patterns.

2. Affordability and Cost-Efficiency

While ensuring the quality and durability of outdoor tiles is crucial, finding cost-effective options is equally important for DIY enthusiasts. The availability of the cheapest frost-proof outdoor tiles in the market makes it convenient for homeowners to elevate their outdoor spaces without breaking the bank. By carefully researching and selecting budget-friendly frost-proof tiles, DIY pathway projects can be completed within a reasonable budget, allowing homeowners to achieve a high-end look without overspending.

3. Low Maintenance and Easy Installation

Another compelling reason to opt for frost-proof outdoor tiles is their low maintenance requirements. These tiles are resistant to stains, mold, and mildew, translating to minimal upkeep and cleaning efforts. Furthermore, many frost-proof outdoor tiles are designed for easy installation, making them suitable for DIY projects. With the right tools and guidelines, …

Upgrade Your Outdoor Space with the Cheapest Frost-Proof Outdoor Tiles for DIY Pathways Read More
Discover the Best Aromatic Incense Sticks for Relaxation and Stress Relief

Discover the Best Aromatic Incense Sticks for Relaxation and Stress Relief

In the fast-paced world we live in, finding moments of tranquility and peace is essential for maintaining mental and emotional well-being. Aromatic incense sticks have been used for centuries to create calming atmospheres, promote relaxation, and alleviate stress. With a myriad of scents available, choosing the right incense sticks can enhance your wellness routine and provide a sense of serenity in your daily life. In this article, we explore some of the best aromatic incense sticks known for their relaxation and stress-relief properties.

1. Lavender

Lavender is a popular choice for its soothing and calming effects. Known for its floral and herbaceous scent, lavender incense sticks can help reduce anxiety, promote better sleep, and create a peaceful ambiance. Lighting a lavender-scented incense stick before bedtime can improve relaxation and prepare you for a restful night’s sleep.

2. Sandalwood

Renowned for its warm and woody fragrance, sandalwood incense sticks are often used for meditation and relaxation practices. Sandalwood is believed to help clear the mind, reduce stress, and enhance focus. Lighting a sandalwood incense stick can create a tranquil environment conducive to meditation or simply unwinding after a long day.

3. Rose

With its sweet and floral aroma, rose-scented incense sticks are ideal for invoking feelings of love, comfort, and relaxation. Rose incense is known for its mood-lifting properties and can help alleviate stress and anxiety. Lighting a rose-scented incense stick during moments of self-care or when seeking emotional balance can enhance your overall sense of well-being.

4. Patchouli

Patchouli incense sticks exude a rich and earthy scent that is both grounding and calming. Often associated with spiritual practices and stress relief, patchouli is believed to promote relaxation, balance emotions, and boost mood. Lighting a patchouli-scented incense stick can create a warm and inviting atmosphere, perfect for unwinding and rejuvenating the …

Discover the Best Aromatic Incense Sticks for Relaxation and Stress Relief Read More
Step-by-Step Guide: How to Install Porcelain Patio Tiles on a Concrete Slab

Step-by-Step Guide: How to Install Porcelain Patio Tiles on a Concrete Slab

Adding porcelain patio tiles to a concrete slab can transform your outdoor space into a stylish and durable oasis. Whether you’re looking to revamp your patio, create a cozy outdoor dining area, or enhance the aesthetics of your backyard, installing porcelain tiles is a great way to achieve a modern and sleek look. In this step-by-step guide, we will walk you through the process of installing porcelain patio tiles on a concrete slab, ensuring a professional and long-lasting finish.

Materials You Will Need:

  • Porcelain patio tiles
  • Concrete slab
  • Tile adhesive
  • Notched trowel
  • Spacers
  • Tile cutter or wet saw
  • Grout
  • Grout float
  • Sponge
  • Sealer (optional)

Step 1: Prepare the Concrete Slab

Before you begin laying the porcelain tiles, ensure that the concrete slab is clean, dry, and free of any debris or dirt. Sweep the surface thoroughly and repair any cracks or uneven areas to create a smooth and level base for the tiles.

Step 2: Plan the Layout

Decide on the layout and pattern you want for your porcelain patio tiles. Measure the dimensions of the concrete slab and mark the starting point for your tile installation. Use chalk lines or tile spacers to create a grid that will guide the placement of the tiles.

Step 3: Apply Tile Adhesive

Using a trowel, apply a layer of tile adhesive to a small section of the concrete slab. The adhesive should be spread evenly and with grooves to ensure proper adhesion of the tiles. Work in small sections to prevent the adhesive from drying out before laying the tiles.

Step 4: Install the Porcelain Tiles

Place the porcelain tiles on the adhesive, following the layout you planned earlier. Press each tile firmly into the adhesive, using spacers to maintain consistent gaps between the tiles. Continue laying the tiles in sections, making …

Step-by-Step Guide: How to Install Porcelain Patio Tiles on a Concrete Slab Read More
Understanding the Timeline and Costs of a Full Kitchen Remodel: What to Expect

Understanding the Timeline and Costs of a Full Kitchen Remodel: What to Expect

Embarking on a full kitchen remodel is an exciting yet daunting endeavor for many homeowners. It is a significant investment that requires careful planning, budgeting, and coordination of various tasks. In this article, we will explore what to expect during a full kitchen remodel in terms of timeline and costs, helping you navigate the process with confidence and clarity.

1. Planning and Design Phase

Before any physical work begins, the planning and design phase sets the foundation for the entire kitchen remodel project. This stage involves consultations with designers and contractors, creating a layout, selecting materials, appliances, and fixtures, obtaining permits, and finalizing a budget. The planning and design phase typically takes 1-3 months, depending on the complexity of the project and decision-making processes.

2. Demolition and Preparation

Once the design phase is complete, the demolition and preparation stage begins. This involves removing existing fixtures, cabinets, appliances, flooring, and walls as needed to prepare the space for the new kitchen layout. Demolition and preparation can take 1-2 weeks, depending on the size of the kitchen and the extent of the work required.

3. Structural Changes and Plumbing/Electrical Work

If structural changes, plumbing, or electrical work are necessary for the new kitchen layout, this phase will follow the demolition stage. This may involve moving walls, relocating plumbing fixtures, rewiring electrical circuits, or installing new lighting. Structural changes and plumbing/electrical work can take 2-4 weeks, depending on the scope of the project and the complexity of the tasks.

4. Installation of Cabinets, Countertops, and Appliances

Once the structural and utility work is complete, the installation of cabinets, countertops, and appliances can begin. This phase includes fitting and installing new cabinetry, countertops, backsplashes, and appliances to bring the kitchen design to life. The installation of cabinets, countertops, and appliances typically takes 2-4 weeks, …

Understanding the Timeline and Costs of a Full Kitchen Remodel: What to Expect Read More