
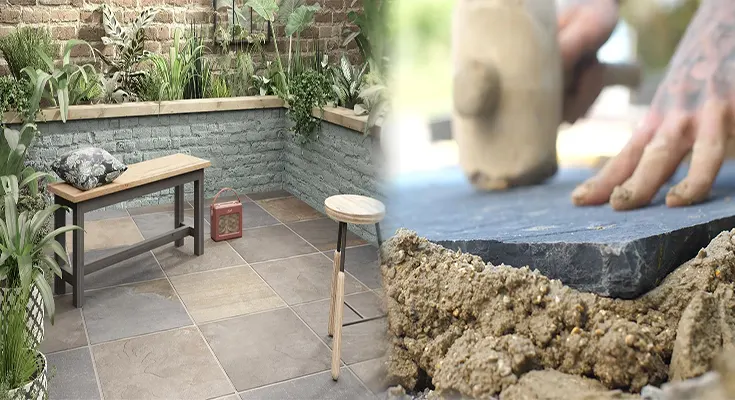
Adding porcelain patio tiles to a concrete slab can transform your outdoor space into a stylish and durable oasis. Whether you’re looking to revamp your patio, create a cozy outdoor dining area, or enhance the aesthetics of your backyard, installing porcelain tiles is a great way to achieve a modern and sleek look. In this step-by-step guide, we will walk you through the process of installing porcelain patio tiles on a concrete slab, ensuring a professional and long-lasting finish.
Materials You Will Need:
- Porcelain patio tiles
- Concrete slab
- Tile adhesive
- Notched trowel
- Spacers
- Tile cutter or wet saw
- Grout
- Grout float
- Sponge
- Sealer (optional)
Step 1: Prepare the Concrete Slab
Before you begin laying the porcelain tiles, ensure that the concrete slab is clean, dry, and free of any debris or dirt. Sweep the surface thoroughly and repair any cracks or uneven areas to create a smooth and level base for the tiles.
Step 2: Plan the Layout
Decide on the layout and pattern you want for your porcelain patio tiles. Measure the dimensions of the concrete slab and mark the starting point for your tile installation. Use chalk lines or tile spacers to create a grid that will guide the placement of the tiles.
Step 3: Apply Tile Adhesive
Using a trowel, apply a layer of tile adhesive to a small section of the concrete slab. The adhesive should be spread evenly and with grooves to ensure proper adhesion of the tiles. Work in small sections to prevent the adhesive from drying out before laying the tiles.
Step 4: Install the Porcelain Tiles
Place the porcelain tiles on the adhesive, following the layout you planned earlier. Press each tile firmly into the adhesive, using spacers to maintain consistent gaps between the tiles. Continue laying the tiles in sections, making sure they are aligned and level with each other.
Step 5: Cut Tiles as Needed
If you encounter edges or corners where full tiles cannot fit, use a tile cutter or wet saw to cut the porcelain tiles to the required size. Measure carefully and make precise cuts to ensure a clean and professional finish.
Step 6: Grout the Tiles
Once all the porcelain tiles are in place and the adhesive has dried, it’s time to grout the joints. Mix the grout according to the manufacturer’s instructions and apply it with a grout float, pressing it into the gaps between the tiles. Wipe off excess grout with a damp sponge before it dries.
Step 7: Seal the Tiles (Optional)
To protect the porcelain patio tiles from stains, moisture, and wear, consider applying a sealant over the grout lines and the surface of the tiles. Follow the manufacturer’s recommendations for the type of sealant to use and the application process.
Step 8: Allow the Installation to Cure
Give the tile adhesive and grout sufficient time to cure according to the manufacturer’s instructions before walking on or using the patio area. This will ensure the tiles are securely bonded to the concrete slab and the grout has set properly.
By following these steps and taking the time to properly install porcelain patio tiles on a concrete slab, you can create a stunning outdoor space that is both visually appealing and functional. Enjoy your newly transformed patio and relax in style in your outdoor oasis!